A beginner-friendly crochet blanket - Quilted Crochet Temperature Blanket - is a free pattern here on the blog! Each little square is so satisfying and I love watching the colors blend and change and play with each other. There are two sizing options for this blanket, which you will find more information about below. Read on to learn about the design inspiration and all materials needed to create this crochet blanket.
Copyright Disclosure
This pattern is for your own personal use. No unauthorized reproduction, in whole or in part (i.e. copying and pasting this pattern into your own document, altering this pattern in any way and calling it your own, etc.), or distribution of this pattern or content (i.e. sharing this pattern in its whole form on your own blog) is allowed. You can use this blog post in blog round-ups. I give permission to sell your items made from this pattern. Please credit “While They Dream” in your listings. The pattern and all photos are the property of While They Dream. You are welcome to share my patterns across all social media forms as long as you link back to my blog directly.
Inspiration
I have wanted to complete a crochet temperature blanket for many years. I attempted once and it was huge and I quit before it was ever fully finished or it would have been a monster. I decided to design my own and hold myself to the promise of finishing. So many temperature blanket projects to unfinished. I wanted to create one that people would want to see through to the end. I absolutely love how mine turned out. It was well worth the effort.
(Photo Below)
January squares complete: Here is December 24th, 2020 through January 31st, 2021.The high and low temperatures are represented. The average high and average low for all of January 2021 will be added in before I start February.

Sizes
Before I get into the sizes I wanted to mention that I thought this could also be an amazing crochet scrappy blanket for all of your leftover yarn. You could use any weight yarn that you prefer – there really are no rules here. And you could make it as long or as short as you want to. My sizing recommendations below are based on creating a temperature blanket (quite a bit of math involved to get it to work out), so if you’re going the scrappy route, feel free to keep going until you’re satisfied with your size. You could go as small as a baby blanket or as large as a king size bed! The sky is the limit!
- For the small version: Use one square per day. Choose either the high, the low, or the average temperature to display on a daily basis. You could also choose to display the high and the low within one square by designating Round 1 to one temperature and Round 2 to another. This is what I have chosen to do for my special days that I want to mark in my large size blanket. For the small version you will create a total of 378 squares. You will be recording 366 days (starting and ending on the same day, example: beginning on January 1st and ending on January 1st) PLUS 12 additional squares. For these 12 additional squares I would suggest that these be your monthly markers. You could choose to mark this before you begin each month or after you complete each month. Either way, mark each month. Some people choose to use one specific color for these monthly markers.
- Your small blanket should be 18 squares wide and 21 squares tall. If your square is on par with mine for gauge this will give you a blanket that is 45 inches wide by 52.5 inches tall (114 cm x 133cm).
- For the large version: Use two squares per day. Record the high and the low. For this blanket you will have a total of 754 squares. This equals 365 days x 2, plus an additional 24 days to represent the average high for the month and the average low for the month (you’ll need to add all of your highs and divide them by the number of days in that month; do the same for the lows). You’ll do this for all 12 months.
- An example for start dates: I started on Christmas Eve, 2020 and ended on December 23, 2021.
- For special days that I want to mark I chose to display two temperatures within one square by doing one color for Round 1 and one color for Round 2. You can see an example of those squares on the previous page.
- Your blanket will be 26 squares wide by 29 squares high. This means you should start decreasing your blanket at 29 squares high. This blanket will be roughly 65 inches wide by 72.5 inches tall (165 cm x 184 cm) which is like an oversized throw/twin bed blanket.
You can see below that I have my Husband's birthday marked. For important dates I will do a two color squares, flip flopping the colors to make both squares different.

Supplies Needed
- Crochet Hook: 5.5 mm/I – adjust your hook size if you adjust the yarn weight. I love using Furls Hooks. They are so comfortable and I don’t get stressed hands or wrists like I once did. Use the code HOOK15 for 15% off.
-
Yarn: City Tweed Dk 123 yards/50 grams (you could also choose to use worsted weight yarn and stick with the same crochet hook size). My friends at We Crochet have contributed to the Quilted Crochet Temperature Blanket.
For the large sized blanket, I used approximately 63 skeins (approximately 7,750 yards/3,150 grams). I can’t tell you how much yarn you’re going to need per color because that is going to vary greatly from one region to another and from one year to the next.
I would estimate that for the small version you would need approximately 32 skeins of yarn (4,000 yards/1,600 grams of yarn).

Stitch Abbreviations
- Ch – chain
- DC – Double Crochet
- 3-Dc Cluster– 3 Double Crochet Cluster: YO, pull up a loop (3 loops on your hook), YO, pull through 2 (2 loops on your hook), YO, pull up a loop (4 loops on your hook), YO, pull through 2 (3 loops on your hook), YO, pull up a loop (5 loops on your hook), YO, pull through 2 (4 loops on your hook), YO, pull through all 4 loops.
- Fp Dc – Front Post Double Crochet
- SC – Single Crochet
- Slst – Slip Stitch
- YO – Yarn Over

Important Notes
- Gauge & Finished Dimensions: My square is 2.5″ wide when complete
- Notes about rows: The Chain 5 in Row 1 counts as a Double Crochet Stitch. The Chain 3 in Row 2 counts as a Double Crochet Stitch.
- Have somewhere that you are recording your temperatures. I use a planner that I use for other purposes as well. You can find historical temperatures on Wunderground.com if you miss a day or are choosing to do a historical blanket.
- This blanket is assembled in a corner to corner manner. You begin with one square, then you attach two on row 2, 3 to row 3, etc. You will find more information about that below and be sure to check out the video!
(Photo Below) Christmas Eve 2020 - June 30th, 2021

How to Plan your Temperature Blanket Colors
I am choosing to use 17 colors from the City Tweed DK line – these colors are actually all available in their Winter, Spring, Summer, and Fall value packs. Some may feel this is a lot, but I really want a good array of colors in my blanket and I am attempting to avoid large color blocks.

GET THE QUILTED CROCHET TEMPERATURE BLANKET PATTERN
Get the Midnight Cowl pattern from my shop and save big when you bundle 3 or more patterns. See the codes below.
- You can find the PDF Pattern HERE
- Add this to your Ravelry Favorites: CLICK HERE
- Grab the PDF Pattern on Love Crafts: CLICK HERE
- Get the pattern on Etsy: CLICK HERE
PATTERN DISCOUNT CODES:
- SAVE10 - Purchase 3+ Patterns and get 10% off
- SAVE15 - Purchase 5+ Patterns and get 15% off
- SAVE20 - Purchase 8+ Patterns and get 20% off
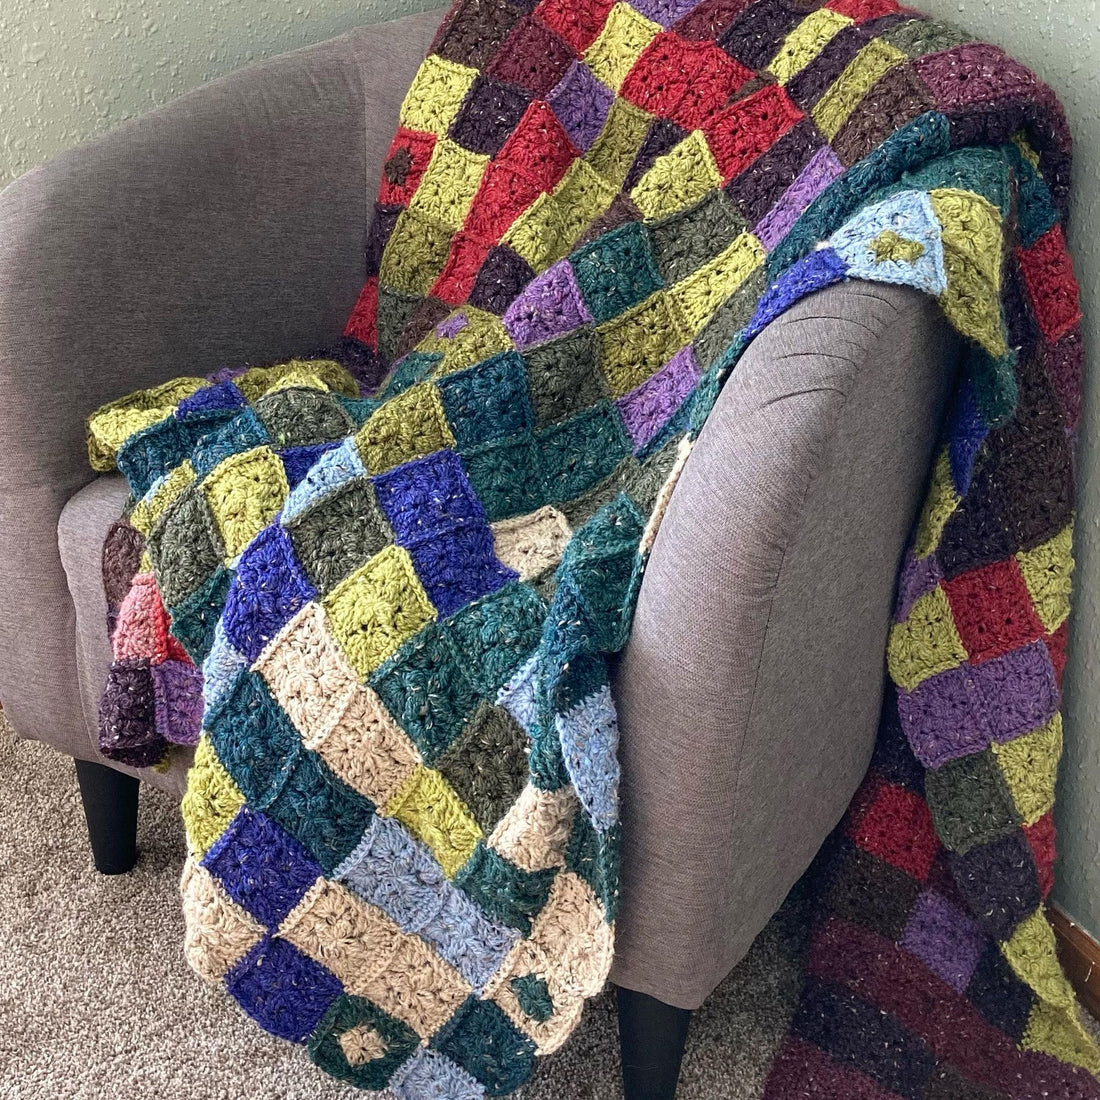
(Photo Below) Finished Blanket photo

Pattern
Creating Your First Square
Round 1: Using the magic circle (or you could ch 3, join and then work the following stitches into the middle) – Ch 5, *3-Dc Cluster, ch 2, Dc, ch 2* Repeat two more times. 3-Dc Cluster, ch 2. Slst to the 3rd chain of your starting ch 5. Pull your magic circle closed tight. (4 Cluster Sts and 4 Dc)
Round 2: Ch 3. 3 Dc into the same ch st that your Ch 3 originates from, *Fp Dc around the 3-Dc Cluster from Row 1, 7 DC into the Dc st from Row 1* Repeat two more times. Fp Dc around the 3-Dc Cluster, 3 Dc into the st directly to the right of your beginning ch 3. Slst to the top of your Ch 3. (4 Fp Dc, 28 Dc)
Single Crochet Edging: Ch 1, Sc into the top of your ch 3. *Sc in the next 7 sts. (Sc, Ch 1, Sc) into the next st.* Repeat two more times. Sc in the next 8 sts, ch 1, slst to the first sc st. Fasten off. (9 Sc on each side, 4 ch 1 in each corner).
Complete Rounds 1 and 2.
(Photo Below) Finished Blanket Photo. Be sure to read on to complete more squares and watch the video tutorial.

Creating All Other Squares
Single Crochet Edging and Join As You Go.
(Alternatively, you could choose to not join as you go. If you choose to not join as you go you will want to use the pattern above to make all of your squares).
Ch 1, Sc into the top of your ch 3. Sc 8. Pull your loop long. Find the top right corner of whichever square you need to attach to. Insert your hook into that squares corner ch 1 space. With wrong sides together, grab your long loop from your working square and pull it through your finished square. Pull it tight. Ch 1. Insert your hook through your first stitch on your working square and through your first stitch of your finished square. Sc through both stitches. Continue single crocheting through both stitches for 8 more sts. Find your next set of directions below:
If you are attaching to one square: Ch 1, and move down your next edge, no longer working through two squares.
If you are attaching to two squares: Pull up your loop and remove your hook. Insert your hook into the corner ch 1 space of the square below your working square (the square you need to attach to next). Then insert your hook into the corner ch 1 space of the square you were just attaching to. Pull your loop through both squares. Ch 1. Insert your hook into the same stitch that you ended with on your working square. Insert your hook into the first stitch on your new square that you need to attach to next. Sc through both sts. Sc in the next 8 sts, Ch 1, Sc in the same st, Sc in the next 8 sts, Ch 1. Sl st to the first sc st. Fasten off.
Watch Me Crochet the Quilted Crochet Temperature Blanket
(Photo Below) Finished Blanket
