The Stars Aligned Blanket is a free pattern here on the blog! Read on to learn about the design inspiration and all materials needed to create this crochet blanket.
Copyright Disclosure
This pattern is for your own personal use. No unauthorized reproduction, in whole or in part (i.e. copying and pasting this pattern into your own document, altering this pattern in any way and calling it your own, etc.), or distribution of this pattern or content (i.e. sharing this pattern in its whole form on your own blog) is allowed. You can use this blog post in blog round-ups. I give permission to sell your items made from this pattern. Please credit “While They Dream” in your listings. The pattern and all photos are the property of While They Dream. You are welcome to share my patterns across all social media forms as long as you link back to my blog directly.
Inspiration
I love quilts, but I don't do a lot of sewing. Maybe someday. For now I just enjoy crocheting quilt style blankets. The Stars Aligned Blanket is the perfect blanket to go stash diving with. For my own version I am using colors from my 2023 Nature and Nostalgia Yarn Clubs.
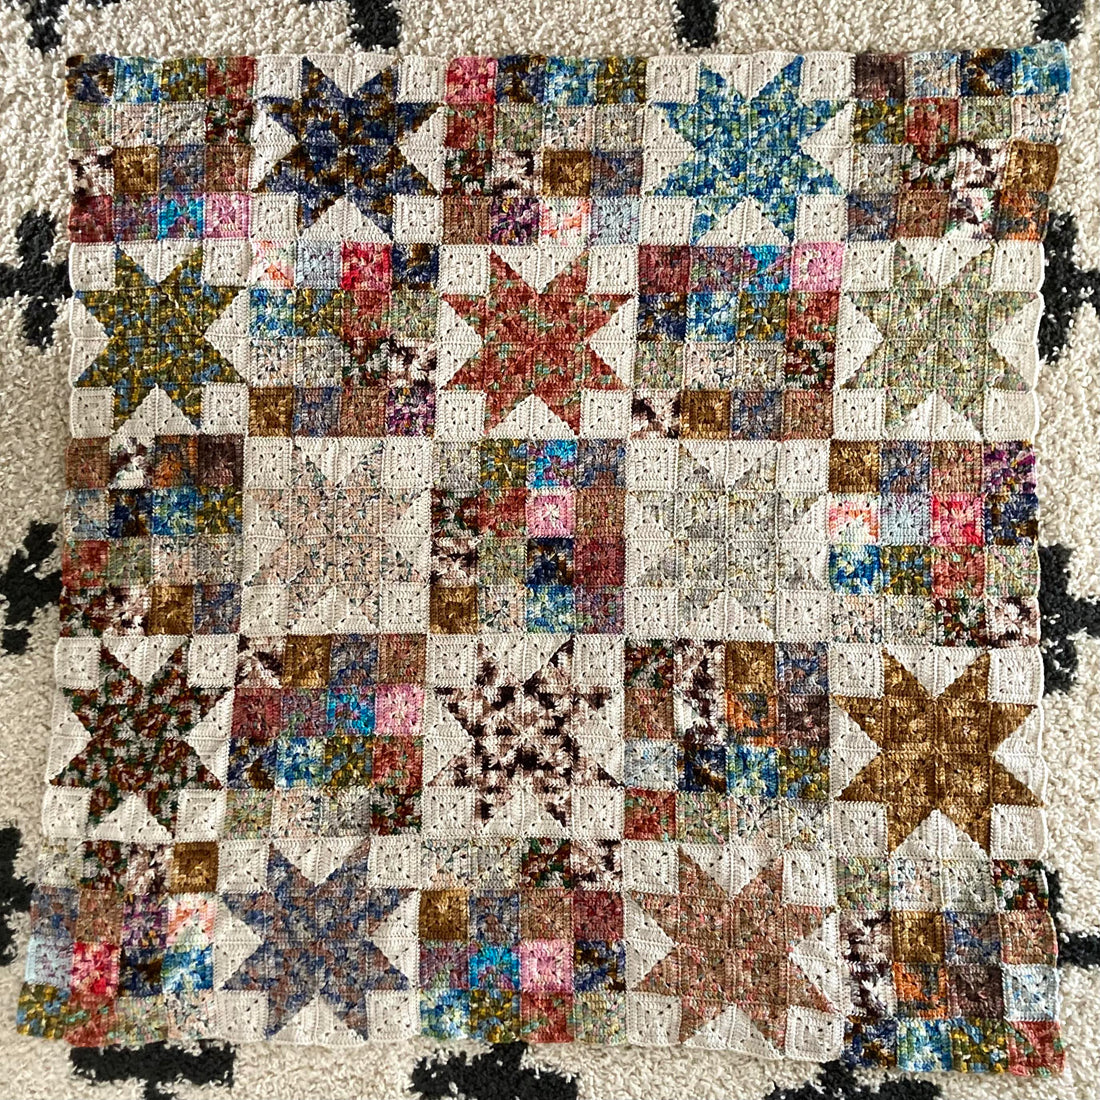
The inspiration for this blanket is based off of this super scrappy looking sewn quilt. Notice how all of the squares are patterned? I thought that using variegated yarns from my two yarn clubs would be a perfect way to represent the scrappiness of this quilt.

The End Result

Due to the fact that I was creating new colors every month of 2023, I had no idea what the end result of my quilt would actually look like. When I created my Birds of a Feather Blanket in the beginning of 2022 I had to let go and learn to trust the process of "blindly creating" throughout the year. I used bare yarn, paired with a monthly yarn club color inspired by birds from from Made by Hailey Bailey. I never knew what color was coming next.
The Birds of a Feather Blanket is what got me hooked on the process of trusting a future outcome. Since creating that blanket I've had several other people start their own, blindly creating their own versions. I have found it gives people a bit of anxiety...giving up control of where things may go and trusting that they'll be happy at the end of it all. I think that's where the beauty lies. I think it's a direct representation of life.
Here's a look at the end result of my Birds of a Feather Blanket.
Sizes
- Each square is 2.75 inches (7 cm)
- The final dimensions will be: 55 inches (140 cm) x 55 inches (140 cm)
- If you use DK weight yarn I would suggest checking your size after completing your rounds to see if you're close to the 2.75 in (7cm). If it's smaller than this dimension your blanket will just be a bit smaller than the worsted weight version.
Supplies Needed
- Crochet Hook: 4.5mm/G+ – adjust your hook size if you adjust the yarn weight. I love using Furls Hooks. They are so comfortable and I don’t get stressed hands or wrists like I once did. Use the code HOOK15 for 15% off. You may need to adjust your hook size if you use a different weight of yarn.
- Yarn: I am using a worsted weight yarn. There are no rules here. Use whatever weight you'd like to use.
- Colors Used and Yardage:
- Each worsted weight square requires approximately 4.7g/10 yards
- In a 100g skein I would say you could comfortably get 22 squares
- The neutral yarn: You’ll need approximately 480g/960 yards – which comes out to needing five 100g skeins. You should have a little leftover which can be used for seaming or a border if you feel you need one.
- For the stars: You will need approximately 80 yards (73m)/38g
- I use the rest of a 100g skein from the star squares for squares throughout the blanket - so plan on using 12 full 100g skeins
- You'll need 52 additional squares. I am using leftover yarn from my Battle Song quilt, which is using 2023 yarn club colors, for these 52 squares. Stash dive and use whatever you can find.
Stitch Abbreviations
- CC – Contrasting Color
- Ch – Chain
- DC – Double Crochet
- MC – Main color
- Slst – Slip Stitch
Chart Plan Notes: If you take a close look you will see that there is actually a pattern to the multicolor squares. This is just a color placement suggestion for anyone that likes a little direction. If you'd rather just randomly place things that's also totally fine.

- You can find the PDF Pattern HERE on my website.
- Grab it on Etsy HERE
- Add it to your Ravelry Favorites HERE

Pattern
How to crochet Half and Half Squares
Note: If you find yourself stuck, the PDF pattern includes a helpful video to show how to work this square.
Round 1: With your MC, make a Magic Circle (or chain 3, join in a circle). Ch 3, work 2 DC, Ch 2, 3 DC into the magic circle, Ch 1. Pick up your CC by pulling your CC through your Ch 1 of your MC, leaving a tail to weave in later. This counts as your second chain for this corner space. Leave your MC to the back. With your CC, *3DC, Ch 2* repeat once more. Join to the top of your beginning Ch 3. If you used a Magic Circle, pull your tail tight to close the hole.
Round 2: Turn your work and slst into the Ch 2 space. (Ch 3, DC) into the Ch 2 space. DC into each stitch across. (2 DC, Ch 2, 2 DC) into the Ch 2 space. DC into each stitch across. 2 DC, Ch 1 in the Ch 2 space. Drop your CC, leaving your working yarn in the front this time. With MC, pull through the ch 1 (this counts as your second chain). 2 DC in the Ch 2 space. DC in each stitch across. (2 DC, Ch 2, 2 DC) in the Ch 2 space. DC in each stitch across. (2 DC, Ch 2) in the Ch 2 space. Join to the top of your beginning Ch 3. Fasten off. Weave in your ends.
Round 3: Turn your work and slst into the Ch 2 space. (Ch 3, DC) into the Ch 2 space. DC into each stitch across. (2 DC, Ch 2, 2 DC) into the Ch 2 space. DC into each stitch across. (2 DC, Ch 1) in the Ch 2 space. Drop your MC, leaving your working yarn to the back this time. With CC, pull color through the MC ch 1 (this counts as your second chain). 2 DC in the Ch 2 space. DC in each stitch across. (2 DC, Ch 2, 2 DC) in the Ch 2 space. DC in each stitch across. (2 DC, Ch 2) in the Ch 2 space. Join with a slst to the top of your Ch 3. Fasten off. (11 DC on each side and one Ch 2 in each corner).

How to Crochet Solid Squares
Round 1: Make a Magic Circle (or chain 3, join in a circle). Ch 3, work 2 DC, Ch 2, 3 DC into the magic circle, Ch 2. *3DC, Ch 2* repeat once more. If you used a Magic Circle, pull your tail tight to close the hole. Join with a slst to the top of your beginning Ch 3. (3 DC on each side and one Ch 2 in each corner).
Round 2: Ch 3, DC into the next 2 DC sts. *(2 DC, Ch 2, 2 DC) into the Ch 2 space. DC into each stitch across* repeat two more times. (2 DC, Ch 2, 2 DC) into the Ch 2 space. Join with a slst to the top of your beginning Ch 3. (7 DC on each side and one Ch 2 in each corner).
Round 3: Ch 3, DC into the next 4 DC sts. *(2 DC, Ch 2, 2 DC) into the Ch 2 space. DC into each stitch across* repeat two more times. (2 DC, Ch 2, 2 DC) into the Ch 2 space. 2 DC in the next two DC sts. Fasten off. Invisible join.